
How to Remove and Reinsert a Double-Hung Window Sash
Understanding how to remove and reinsert a double-hung window sash properly is crucial for effective window maintenance. Whether you need to clean, repair, or replace a window, mastering this process ensures an unimpeded view through both the lower sash and upper sash.
Step-by-Step Procedure:
- Unlock and Raise the Lower Sash:
- Unlock the window and raise the lower sash to a midway point.
- Locate the tilt latches on both sides of the lower sash.
- Depress these latches and gently pull the top of the sash towards you, ensuring you don’t damage the window.
- Tilt the sash inward and lift it out of the track. Move the sash gently to avoid stressing the glass panes.
- Lower and Remove the Upper Sash:
- Lower the upper sash about six inches from the top frame.
- Locate the tilt latches, press them, and then tilt the sash inward.
- Once the upper sash is tilted towards the interior, lift it out of its tracks. Handle the upper sash carefully to avoid damage.
- Reinsert the Upper Sash:
- Insert the upper sash into the frame, ensuring it is in the same six-inch down position.
- Align it with the side tracks and push the sash into the frame until the tilt latches click into place.
- Gently slide the upper sash upwards to confirm it’s secure and moves freely.
- Reinsert the Lower Sash:
- Position the lower sash halfway up the track.
- Engage the tilt latches and fit the sash into the tracks as before.
- Adjust the sash until the tilt latches snap back into place, confirming the sash is secure within its frame.
- Test the sliding motion to ensure it operates smoothly.
Following these steps ensures the double-hung window sash is correctly realigned, allowing the window to function efficiently. Properly removing and reinserting the sashes, whether upper or lower, contributes to the window’s longevity, making it easier to clean, repair, or replace components as necessary. Viewing clean glass panes without obstruction is the result of meticulous attention to these details.
At San Diego Window Replacement, we encourage homeowners to refer to additional resources for more detailed visual aids, reinforcing these steps for a more straightforward, more effective process. Trusting these methods will mitigate potential damages and extend the useful life of your windows, ensuring they remain both functional and aesthetically pleasing. For more comprehensive guidance, reach out to professional services whenever in doubt.
What Are Window Grids?
Window grids, also referred to as window grilles, are decorative features that divide a window into smaller sections or panes. These grids can be either purely aesthetic or functional, affecting both the appearance and structural integrity of the window. In earlier architectural designs, window grids were primarily used to support the window’s structure. Nowadays, they serve to enhance the design and can contribute to the overall aesthetic appeal of a home. Whether you’re dealing with standard grids or perimeter grids, understanding the type of grids on your Milgard windows is crucial for proper maintenance and cleaning.
Types of Window Grids:
- Standard Grids:
- Divide the window into several smaller glass panes.
- Create a classic and timeless look.
- Common in Milgard windows.
- Perimeter Grids:
- Run along the edges of the windows.
- Provide a more modern and sleek design.
- Also found in Milgard windows.
Materials of Window Grids:
- Wood: Offers a traditional and elegant look but requires regular upkeep to prevent rot and decay.
- Vinyl and Aluminum: More durable and easier to clean, making them a popular choice for modern homes.
Cleaning and Maintenance:
- Regular Cleaning: It is essential to keep your windows looking their best.
- Use Mild Detergent and Soft Cloth: To prevent scratching the glass.
- Focus on Corners and Edges: Where dirt and grime can accumulate.
- Removable Grids: Follow the manufacturer’s instructions for removing and reinserting.
Window Screens:
- Maintain Quality: Keep out insects and debris that affect the appearance of window grids.
- Regular Cleaning: Helps maintain a clear view and keeps windows looking pristine.
If you’re looking for additional resources or detailed information on window grids, the team at San Diego Window Replacement is here to help. From standard grids to perimeter grids, we provide comprehensive information to help you keep your Milgard windows in top condition. Our services include professional cleaning, grid removal, and reinstallation, ensuring your windows remain both beautiful and functional. For all your window maintenance needs, trust the experts at San Diego Window Replacement.
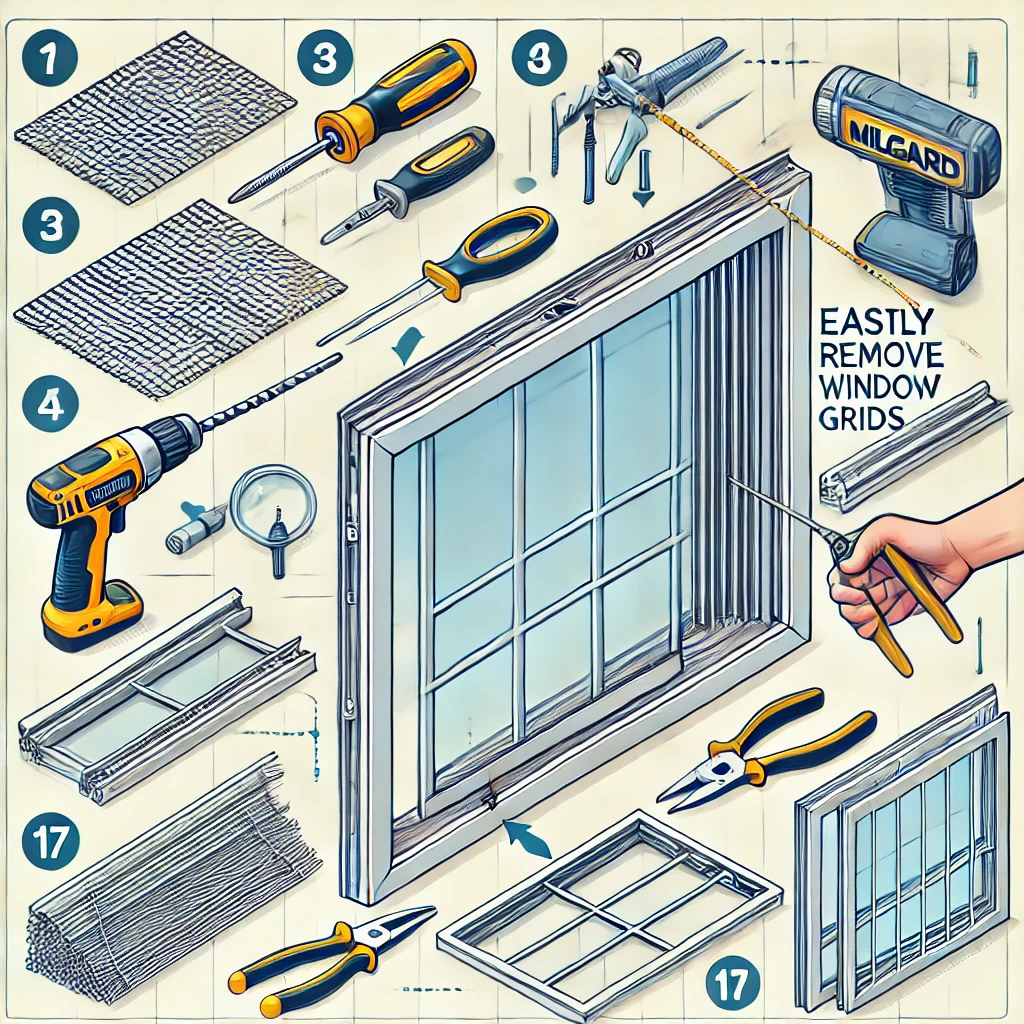
Instructions to Remove Grids From Window
Removing the grids from your Milgard windows not only facilitates easy cleaning but also offers a more unobstructed view of the outside. Whether you have standard grids or perimeter grids, it is crucial to know the proper steps to remove them without causing any damage to your window sash, glass panes, or window screen.
Step-by-Step Procedure:
- Gather Necessary Tools:
- Flat-head screwdriver
- Putty knife
- Pair of gloves to protect your hands
- Open or Unlock the Window:
- Provides better access for removal.
- Ensures you won’t damage the window sash or glass panes.
- Inspect Grid Attachment Points:
- For standard grids: Locate small tabs or clips that hold the grids in place.
- For perimeter grids: Grids might be secured at the edges with silicone or adhesive material.
- Insert the Putty Knife:
- Gently insert between the grid and the glass or frame.
- Carefully work around the perimeter to loosen the grid.
- Be cautious not to scratch or damage the glass panes and window sash.
- Remove the Grid:
- Once attachment points are loosened, carefully pull the grid away from the glass panes.
- For perimeter grids: Ensure all corners are detached before complete removal.
- Gently pull the grid away from the window sash, ensuring no fragments are left behind.
- Inspect and Clean the Window:
- Ensure all remnants of adhesive or clips are removed.
- Clean the glass panes and window sash to remove any residual substances.
Following these steps ensures that you properly remove the grids from your Milgard windows. Whether you plan to reinstall the grids or leave your windows without them for a clearer view, taking the correct precautionary measures is essential. It’s always best to handle window screens and grids with care to prevent any damage. If you find difficulty in the process, consider seeking professional aid to remove and reinstall the grids, window screens, or even the glass panes.
By adhering to these instructions, you not only maintain the integrity of your Milgard windows but also make future cleaning and maintenance much more straightforward. After completing these steps, your windows will be ready for further cleaning or any desired modifications, providing you with both a practical and aesthetic improvement to your living space. For additional tips or services, feel free to contact San Diego Window Replacement to assist you with all your window grid and window maintenance needs.