
Home improvement projects can feel intimidating, especially when dealing with complex elements like fixed panel window frames. Fortunately, taking out a fixed window frame, mainly a Milgard 2, is easier than it seems. With some timely guidance and the right tools, you can remove a fixed window frame with ease and confidence. This comprehensive guide will walk you through each step of removing and replacing a Milgard® fixed window frame. We’ll ensure you maintain the constant performance of your Milgard® windows and doors throughout the process. Whether it’s a fixed panel window, a frame around the glass, or the intricate parts that hold it all together, we’ve got you covered. Remember, you don’t have to do it alone – contact San Diego Window Replacement for any additional help and support. Proper care and precision will not only remove the window frame but also facilitate easy replacement. Equip yourself with the necessary tools and follow our detailed instructions for a seamless experience with your fixed Milgard 2 window. Stay tuned for more essential tips, like the tools and steps to remove fixed glass windows and why Milgard® windows are the superior choice for durability and design. We aim to make your window replacements smooth and hassle-free, maintaining the excellent performance of your Milgard® windows and doors. Let’s get started on this DIY window frame removal and replacement journey.
How to Remove and Replace a Milgard® Fixed Window Frame
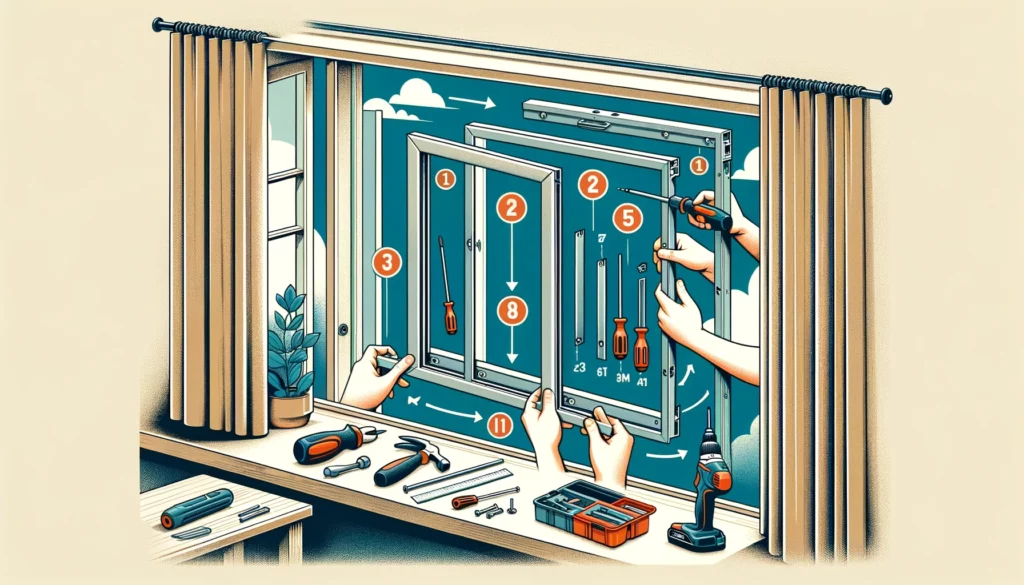
Removing and replacing a Milgard® fixed window frame may seem daunting, but with the right approach, it can be straightforward. Here’s a step-by-step guide:
- Remove the Trim: Carefully start by removing the trim surrounding the window. Use a pry bar to elevate the trim without causing damage. If the frame and glass are caulked, utilize a utility knife to cut through the caulk seal. This step allows easier removal of the frame from the wall.
- Support the Glass: Once the frame is free, ensure you have assistance to support the glass while you carefully lift out the window pane.
- Prepare the Opening: After the window and frame are removed, it’s essential to prepare the opening for the new window installation. Check for any wood rot or other damages that need to be fixed before proceeding with the window replacement.
- Install the New Frame: Placing the new Milgard® window frame in alignment with the opening is crucial for a successful installation. Secure the window frame into the wall using screws, making sure it fits well and is level.
- Seal the Frame: Reapply caulk around the frame to create a weather-tight seal. Reattach the interior trim to your new window, ensuring it sits flush against the window frame.
Adhering to these steps ensures a smooth and efficient window replacement process. Though it might appear intricate, following this guide on how to remove and replace a Milgard® fixed window frame will ensure your new window installation goes off without a hitch, maintaining both aesthetics and functionality. Properly replacing your Milgard windows will not only enhance your home’s appearance but also improve energy efficiency, making this project worthwhile.
Tools and Steps to Remove Fixed Glass Windows
Before diving into the actual removal process, it’s crucial to gather the necessary tools. Here’s the list of what you’ll need:
- Utility knife
- Pry bar
- Hammer
- Screwdriver
- Safety glasses
- Gloves
- Putty knife
- Drop cloth
- Silicone sealant
Step-by-Step Process:
- Prepare the Work Area: Start by clearing the area around the window. Remove furniture, decorations, or obstructions to ensure you have ample space to work. Lay down a drop cloth to protect your floor and catch any debris.
- Safety First: Always wear safety glasses and gloves to protect yourself from broken glass and sharp edges. Safety should be your top priority during this process.
- Remove the Sash Stops: Using a utility knife, carefully cut through the paint or caulk, sealing the sash stops to the frame. Insert a putty knife between the sash stop and the frame to gently pry it loose. Be cautious not to damage the sash stops, as you’ll need to reuse them later.
- Cut Through the Sealant: With the sash stops removed, use the utility knife to cut through any remaining sealant around the window frame. This step is crucial to ensure the frame comes out cleanly without damaging the surrounding wall.
- Pry the Frame Out: Insert a pry bar between the window frame and the wall. Gently work your way around the frame, prying it loose from the wall. Be patient and take your time to avoid cracking or breaking the glass. If the frame is particularly stubborn, use a hammer to tap the pry bar for added leverage.
- Remove the Fixed Window Frame: Once the frame is loose, carefully lift it out of the opening. Have a partner assist you if the window is oversized or heavy to prevent injury or damage.
- Clean the Opening: With the frame removed, inspect the opening for any remaining sealant or debris. Use a putty knife to scrape away any residue and ensure a clean surface for the new frame.
- Install the New Glazing Beads: Measure the opening and cut the replacement glazing beads to size. Apply a bead of silicone sealant around the edge of the opening, then press the new glazing beads into place. This step is crucial for maintaining the integrity and performance of your new window.
- Insert the New Frame: Carefully lift the new Milgard® fixed window frame into the opening. Ensure it’s level and square before securing it in place. Use screws to attach the frame to the wall, making sure they’re evenly spaced for optimal support.
- Reinstall the Sash Stops: Reattach the sash stops by pressing them back into place around the frame. Use a hammer and finishing nails to secure them, ensuring they’re flush with the frame.
- Seal the Edges: Apply a bead of silicone sealant around the perimeter of the frame to create a watertight seal. Smooth the sealant with your finger or a caulking tool for a neat finish.
- Final Inspection: Inspect the window for any gaps or imperfections. Make sure the frame is securely in place and the sealant is applied correctly. Clean the glass and surrounding area to complete the installation.
Maintaining Constant Performance of Milgard® Windows and Doors
Regular maintenance is essential to ensure the constant performance of your Milgard windows and doors. By adhering to a few simple practices, you can keep your windows and doors in peak condition and extend their lifespan significantly.
- Regular Cleaning: Start by regularly cleaning the glass with a non-abrasive cleaner. This keeps your windows looking clear and enhances their overall appearance.
- Inspect Seals: Check the seals around the frame for any signs of wear or damage. Damaged seals should be replaced promptly to prevent drafts and leaks, ensuring your windows and doors maintain their efficiency.
- Lubricate Moving Parts: Lubricating the moving parts of your windows and doors is also important. Use a silicone-based lubricant to ensure smooth operation. This simple step can make a big difference in the long-term performance of your windows and doors.
- Inspect for Damage: Additionally, it’s vital to inspect for any signs of damage to the frame or glass regularly. Addressing any issues immediately can prevent further damage and maintain the integrity of the windows and doors.
At San Diego Window Replacement, we’re committed to helping you keep your Milgard windows and doors in optimal condition. By following these maintenance tips, you’ll be ensuring not just the constant performance but also the longevity of your windows and doors. For any replacement needs, remember that we offer top-quality service and genuine Milgard parts to keep your home’s windows and doors functioning flawlessly.
Why Choose Milgard® Windows
Milgard® is renowned for its high-quality, durable windows and doors. This exceptional brand focuses on innovation and customer satisfaction, consistently delivering top-tier products. By choosing Milgard windows, you’re selecting items designed to provide long-lasting performance. Milgard products not only enhance the beauty of your home but also significantly improve its functionality.
To maintain the outstanding performance of your Milgard window, follow the steps outlined in this guide. Removing and replacing a fixed window frame has always been challenging with our comprehensive instructions. Ensuring your home remains comfortable and energy-efficient is a priority, and these steps will help you achieve just that.
At San Diego Window Replacement, we understand why homeowners choose Milgard windows. The reliability and durability of Milgard windows make them a leading choice for residential improvements. Whether you’re upgrading a single room or undergoing a complete home renovation, Milgard windows are the perfect addition.
We offer expert services to help you maintain the constant performance of your Milgard windows and doors. Our technicians are trained to handle all aspects of Milgard window installations, removals, and replacements, ensuring you receive professional and efficient service. With us, you can always trust that the job will be done right.
So, why choose Milgard Windows? The answer is simple: unmatched performance, aesthetic appeal, and lasting durability. When you’re ready to remove and replace a fixed window frame, count on San Diego Window Replacement to provide the expertise and services you need. Let’s keep your home looking its best, one Milgard window at a time.
Final Thoughts
Removing and replacing a fixed window frame, especially a Milgard® fixed window, may seem daunting at first. However, with the right tools, preparation, and patience, you can achieve professional results without needing specialized skills. Remember, the key to a successful installation is thorough preparation and meticulous attention to detail. By following this step-by-step guide, you can ensure your Milgard® windows continue to provide the beauty, efficiency, and durability your home deserves.
For more information on Milgard® windows and doors or to schedule a professional installation, don’t hesitate to contact San Diego Window Replacement. Our website offers a plethora of information, and our team of experts is here to assist you with all your window and door needs. We provide top-notch service and products that you can rely on.
In conclusion, knowing how to remove a fixed window frame, Milgard 2 efficiently empowers you to take control of your home improvement projects. Whether you’re updating your home’s appearance or enhancing its energy efficiency, correctly maintaining your windows is crucial. By understanding the tools and steps involved, you can ensure a smooth and successful window replacement process. Always prioritize safety and take your time to achieve the best results. For more information, visit our site regularly.
So, the next time you face the task of removing a fixed window frame, refer back to this guide and approach the project with confidence. Your home deserves the best, and with Milgard® and San Diego Window Replacement, you can achieve outstanding results that stand the test of time. For comprehensive guidance, bookmark our website or save a window document. Your window screen and perimeter frame will thank you.